 |
| Pyrography tool |
The pyrography tool has an exposed 'u' shaped wire at the end which when turned on volts travel through the wire allowing the wire to heat up; you can then use the tool similar to a pen except rather than drawing with ink to create a design your burning the design into the material.
Due to the heat of the exposed wire keep hands and skin out of contact with the wire.
 |
| MDF pyrography sample |
When using the pyrographer you can change the amount of volts - 1.4v, 1.8v, 2v and 2.2v - travelling through the wire which affect how hot the exposed wire becomes. For example 1.4 volts will produce a yellowed mark on MDF however 2.2 volts would create a deep scorched line. As an experiment I used the pyrographer on multiple materials to see how each one would react to the heat and which one is the most effective: MDF, packing foam, ply wood, Styrofoam, natural wood and paper. The paper and foam both burned away without making contact with the wire and therefore the line was really wide, it would be really difficult to create a design using these materials. As for the natural wood and the ply wood although you could create scorch lines along the surface due to the grain it was hard to create a consistent line. However the MDF reacted like the wood allowing you to draw a normal line but due to the lack of grain the marks were consistent therefore I found that MDF was the best material for pyrography.
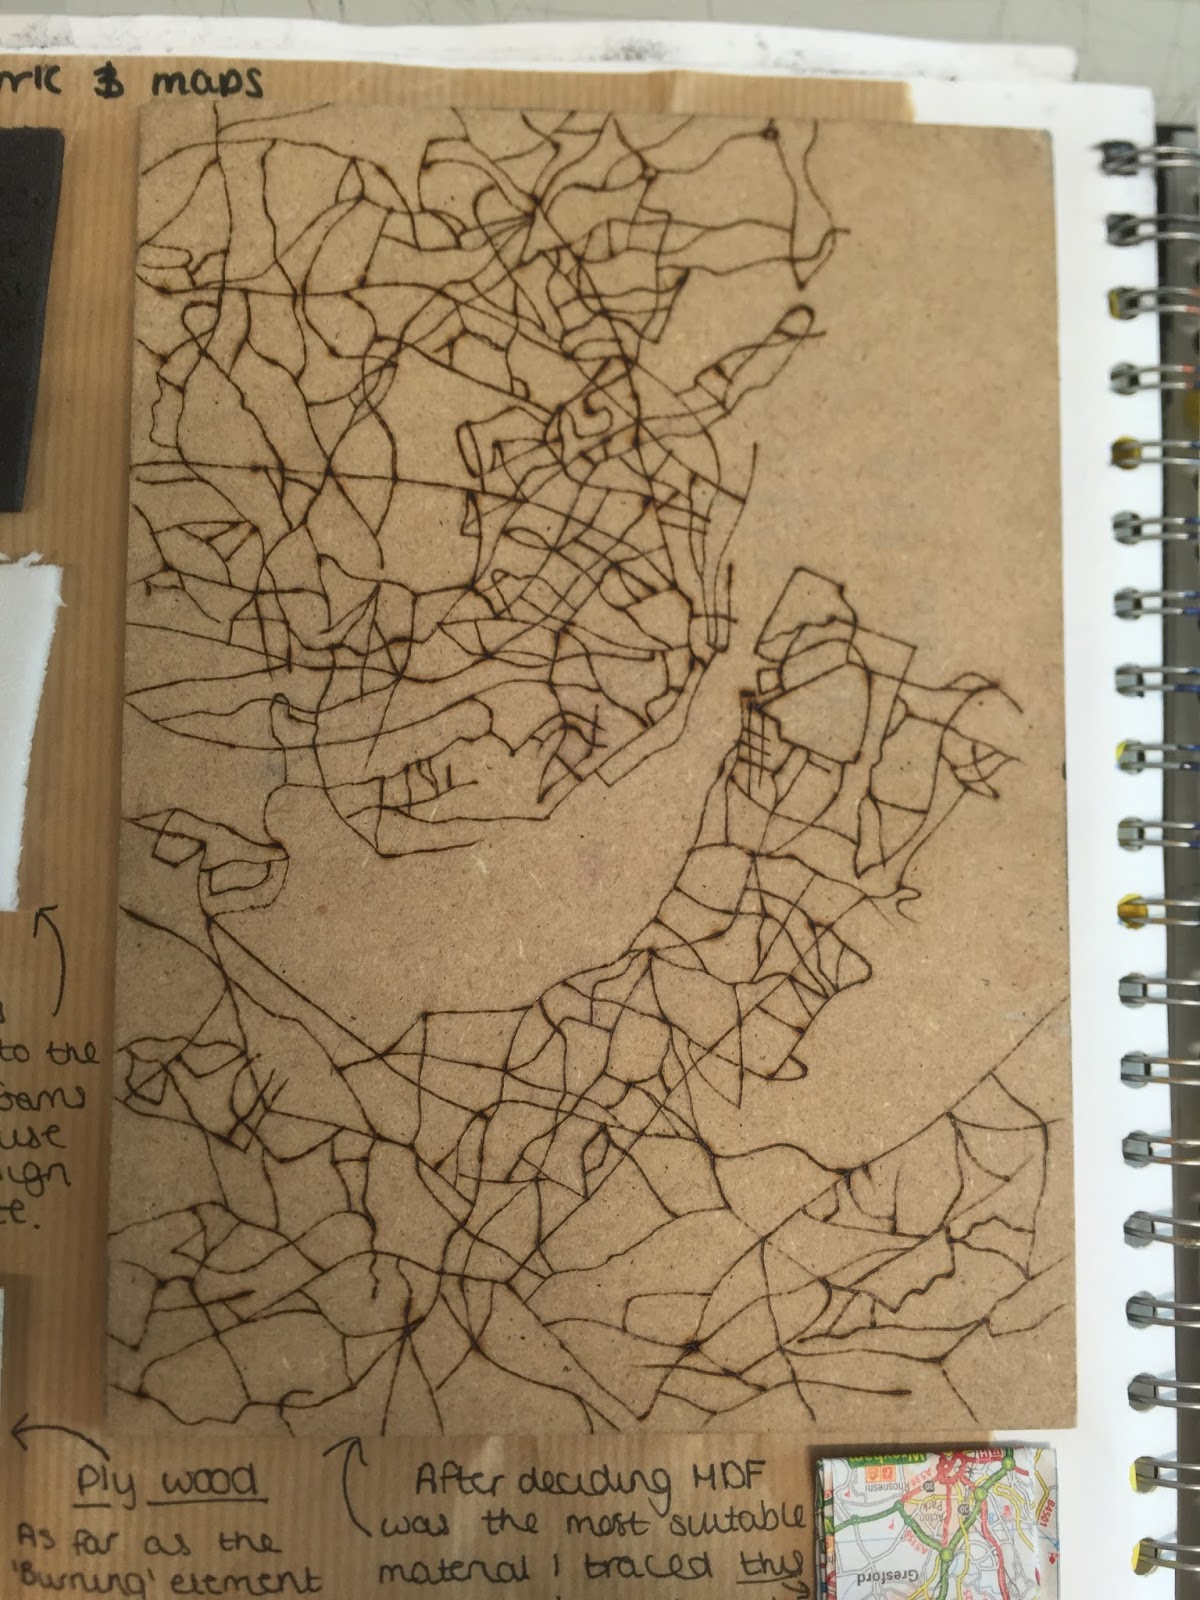 |
| My pyrography map of Liverpool |
 |
| My pyrography sketchbook page |
After deciding that MDF was the best material to use when using the pyrographer tool I decided to begin to incorporate cartography. I traced all the major roads of Liverpool from an AA Road map onto a block of MDF and then followed the design with the pyrography tool. The design looks really effective as only the major roads are visible however due to my research there is a limited amount of ways I could further develop the use of pyrograpy within my project. As although this technique is an interesting way of experimenting with the use of maps and 3D, pyrography itself isn't all that relevant to my research therefore I couldn't use this to produce a focal point for my final piece.


Etching onto Metal
As a suggestion one of my 3D tutors showed me how to use the signograph tool which allows you to engrave into the metal. Just as a quick experimental piece of work I etched onto a small square of sheet metal. The signograph has a range of settings which apply more force to create deeper carvings into the material.
Must use ear defenders and eye protection
I found this tool really hard to control perhaps that was because of the strength of the material therefore more pressure had to be applied to create a dent and the smooth surface made it hard to make lines or marks smoothly. I doubt I will further experiment with this tool on other materials or within the design process.
No comments:
Post a Comment